Archive | Alike and Different RSS feed for this section

Teach Through Games: Dweebies

3 Sep

dweebiesAge level: Early Elementary, Upper Elementary

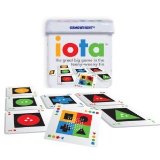
Description: I have yet to meet a student who hasn’t fallen for Dweebies. The cards are entertaining to look at, and while the game is simple to play it involves strategy that allows for critical thinking and high-level observation skills. Players take turns playing cards in a grid format. If a player lays down a Dweebie on a row or column in which the same Dweebie is the other end, that player gets to pick up the entire row or column of cards. The goal of the game is to collect the most cards.

Skills & Modifications: I use these materials without actually playing the game to work on basic skills with early elementary students. I find it especially helpful with K-2 students who need assistance with Pre-K skills such as matching, but need more age-appropriate materials. I play the game as designed for older students. As designed, the game naturally practices higher order scanning skills and problem solving. Some students have difficulty fanning out their card and holding them in their hand. If your student struggles to hold cards in his/her hand, you may want to use a cardholder, such as this one.

  • Expressive Language/Feature – I love using these cards with kindergartners and first graders to play “Tell me about” or “Let’s talk about.” There are many details for each Dweebie, so it’s a great tool for describing a variety of features of the Dweebie pictured.
  • Alike and Different – Students have to determine how two pictures of Dweebies are alike and different. They can compare the color of the Dweebie, whether or not it’s wearing a hat, or notice that one is holding a fishing rod while the other is holding a violin. It’s also good for working on student understanding  of words such as “all” and “some.” For this I’ll lay out 3-4 cards and ask the student “Tell me one thing ALL the Dweebies have in common.”
  • Matching – This is also a great resource for practicing matching with older students who are still struggling with the skill. You can introduce it in a field of three and ask them to match one card or you can make it a game of Memory with 10-20 card turned facedown. Just be sure that you pulled out the right number of matches!
  • Scanning – This game requires higher order scanning skills, because the students has to scan his/her own cards, the cards on the table, AND the placement of the cards on the table. For some students I have them place their own cards face up on the table in front of them, and I help them through minimal prompting scan each area and make decisions about what card to place.
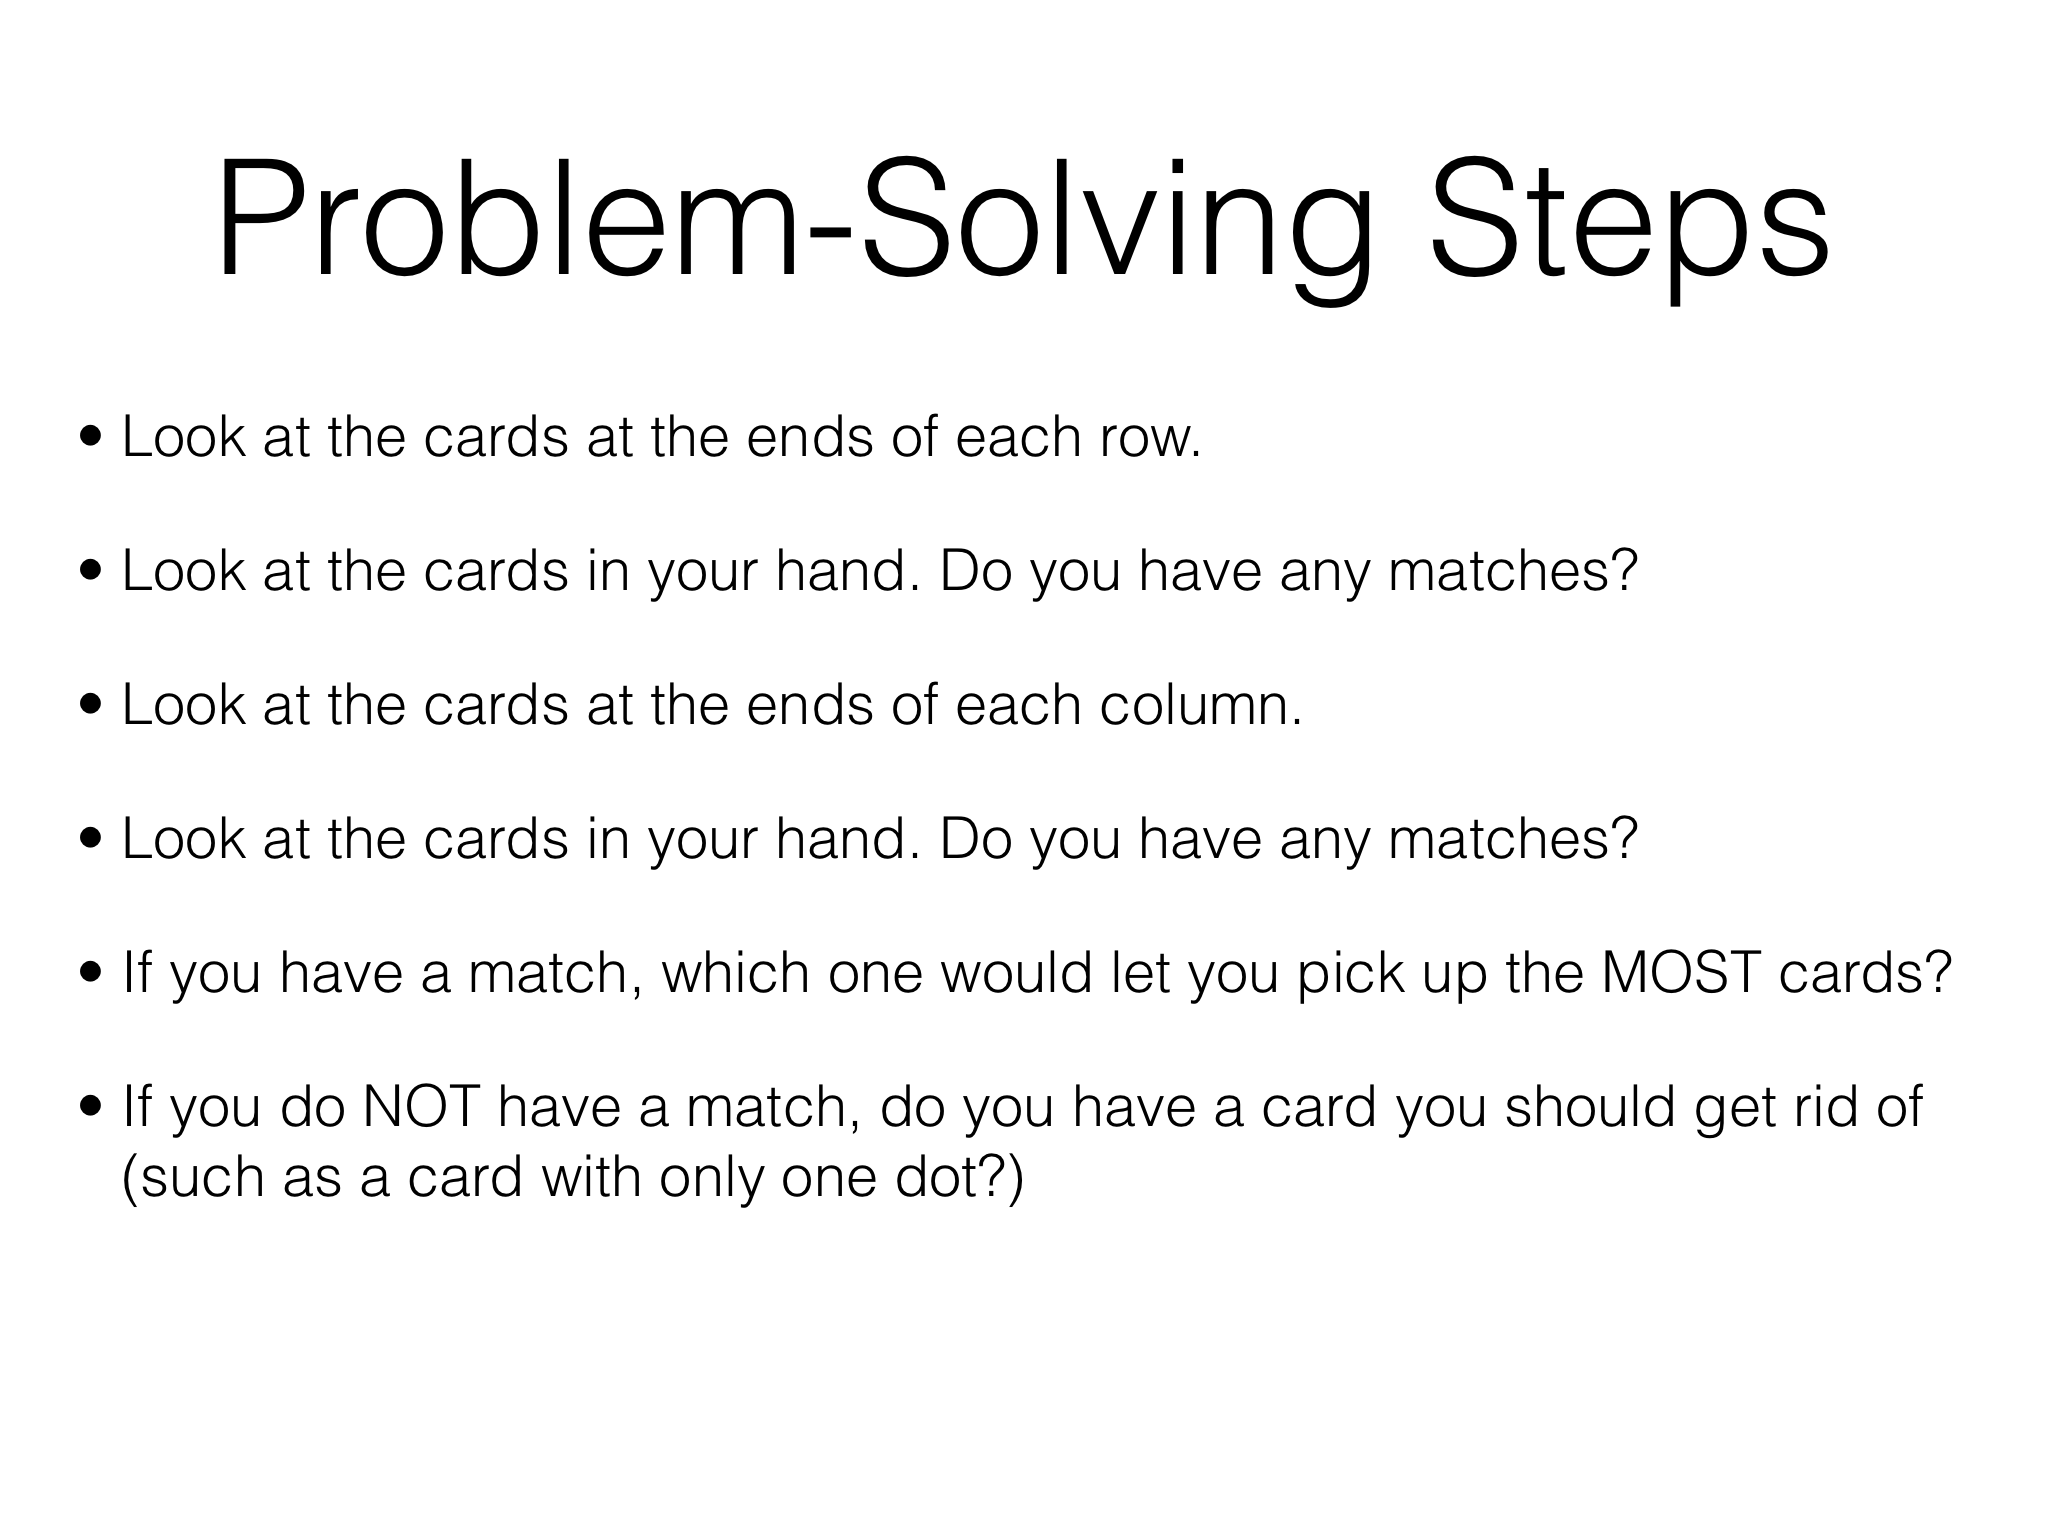
  • Problem Solving – Students have to use their scanning skills and solve the problem of where to place a card to be able to pick up the most cards. For some students, I have them think out loud to describe each step of how they are making their decision. This way I can help correct any errors in their problem solving strategy. There is some strategy based on trying to find the longest row or column of cards that you can collect, but there is also strategy in keeping track of the number of dots in the corner of each card, which indicates how many of that Dweebie are included in the deck. For some students I also create a sign with steps for problem solving:

dweebies problem solving

Pros: The cards are highly motivating. It’s easy to use the materials for a variety of skills. It’s also easy to modify it based on your student’s needs.

Cons: For students who struggle with maintaining attention, this may not be the best game. Some students are motivated to see what card will be placed next, but others need a more interactive element in order to maintain attention and get good practice at key skills from playing the game.

Cost: $9.99 You should invest in this game if: these materials would be motivating for your students and you aree looking for a  game for playing with siblings and peers because it’s easy to modify it for each player.

ABLLS: A10, B5, C55, G16, H40, K15

VB-MAPP: VP-MTS 5, VP-MTS 6, VP-MTS 8, Listener Responding 9

Teach Through Play: Hooray for Play!

29 Aug

HoorayforPlayAge level: Preschool, Early Elementary

Description: I have to admit that I am obsessed with this resource. And not only am I obsessed, but I have been showing this to every ABA therapist that I see. And they are also wowed by this resource. There are 31 cards included in the deck. On the front of each card is an illustration of a pretend play activity, such as an illustration of a pirate standing on a ship, a pilot talking with a passenger while another passenger is putting his suitcase in the overhead compartment, or two children building a sand castle on the beach. On the back of each card are steps for what to do to prepare for pretend play, suggestions for what to say to promote language and interaction, and ideas for how to get started with play. Some cards also include variations on the scenario.

Skills & Modifications: This resource was created by Stacy Asay who provides ABA for students with Autism Spectrum Disorders and other developmental delays in New York City. It is clear these cards were thoughtfully designed to allow teachers and parents to more easily address deficits in a learner’s play skills. Included in the deck are directions for how to use the cards to teach receptive language, Wh questions and inferences, a Who Am I? Game,  and similarities and differences. The cards also support other skills as well, which are detailed below.

  • Peer Play – The deck is designed for working on imaginative or pretend play skills. With many of the scenarios, it is very easy to incorporate peers or siblings. I also love how the illustrations are included. With one student, I was able to place three cards in front of him to let him choose a scenario for our pretend play with his brother. He was much more motivated to engage with the activity because he had chosen it.
  • Foreground & Background –  The illustrations on these cards are detailed enough that they show foreground and background and work with the student on differentiating between the two.
  • Picture Comprehension – Again, the illustrations are simple but detailed enough to provide a lot of visual information. I used these with one student and asked “What’s happening in the picture?” or “Tell me about this.”

Pros: This is incredibly easy to use to work with your students on pretend play and other skills. It’s the type of resource I wish I had when I was first starting out because it provides such a wealth of ideas combined with examples and suggestions. And all of this information is provided in digestible amounts!

Cons: I have no cons for this resource.

Cost: $12.95 here.  You should invest in this deck of cards if: you are a teacher working with students with autism and other developmental delays, you work with social groups or play groups, or you are a parent seeking guidance for encouraging imaginative play with your child.

ABLLS: C34, C43, C44, C55, C57, G7, G8, G15, G16, G17, G22, G39, H22, H30, H40, K7, K8, K10, K11

VB-MAPP: Social Behavior 5, Tact 8, Tact 9, Listener Responding 9, Social Behavior 8, Social Behavior 9, Social Behavior 10, Motor Imitation 10, Tact 14, Social Behavior 14, Social Behavior 15

**Hooray for Play! was provided to me for free by the company Different Roads to Learning. This did not influence my opinions on the resource. The thoughts and ideas above are all my own.

Teach Through Games: Melissa & Doug Sandwich Stacking Games

22 Aug

sandwichstackinggameAge level: Preschool, Early Elementary

Description: This silly game comes with two sets of bread-shaped gloves and fourteen sandwich fillings that attach with velcro to the bread. Add twenty sandwich cards and a booklet with ten different games you can play with the materials, and you have a recipe for a great game.

Skills & Modifications: First of all, I should mention that I love any game that comes with instructions for multiple games. The fact that this comes with instructions for TEN games makes it that much more valuable to me, and it makes my job easier! I can find games that meet the skill level of my student, and then modify them as needed. Also, while I have listed below many ways in which I focus on target skills with these materials, I always end the activity by allowing the student to choose a game or to have free play with the materials for a couple of minutes.

  • Expressive Language – Students are usually highly motivated by these materials, so I use them to create opportunities for expressive language. Sometimes I’ll have the student create any sandwich they want and then describe it to me. Other times I will create sandwiches with the goal of targeting specific words or phrases that I am working on with the student.
  • Alike & Different – Sometimes I’ll have the student make two sandwiches, then describe how the two are alike and different. This provides an opportunity to talk about different ingredients, but also to discuss order of ingredients using words such as top, middle, and bottom.
  • Block Imitation – This is another game that, while it does not use blocks, can be used to test for generalization of block imitation skills. You can use the pictures included with the game, but those are all limited to four ingredients on each sandwich. For some students I take pictures of bigger sandwiches I have made with the game materials and have them recreate it based on the picture.
  • Scanning – I use this frequently to practice scanning skills. I lay out all of the ingredients on the floor (though be careful if the floor is carpeted, the velcro pieces may stick!) The student has to look at the picture card or listen to my instructions and find the correct piece. If we are playing with a peer, scanning may be more challenging because the peer may pick up the piece first, causing your student to have to scan once more to find the piece needed.
  • Peer Play – This is another great game for peer or sibling play. Students are highly motivated by the materials, and are frequently interested to see what other people are making as well.

Pros: This is one of those games that consistently causes giggle-fits with my students. It’s silly, challenging, active, and fun. Oh, and it’s machine-washable.

Cons: I have no cons for this game. It is a little pricey compared to most games and toys I purchase, but the materials are high-quality (which is usually the case with Melissa & Doug products.)

Cost: $29.99 You should invest in this game if:  your student or child is highly motivated by active games, you are looking for materials to increase potential for peer play, or you are working with a range of ages at the same time.

ABLLS: B6, B12, B20, C41, K5, K9, K14, L2, L12, L22

VB-MAPP: VP-MTS 6, VP-MTS 13

Teach Through Books: What Do You Do With a Tail Like This?

21 Aug

WhatDoYouDoAge level: Preschool, Early Elementary

Description: This stunning book by Steve Jenkins and Robin Page uses cut-paper art to illustrate different parts of animals and their uses. Students can explore how a platypus uses his nose or how a bat uses its ears among many other things. The books is also well-organized in that a set of two pages will show several noses along with the question “What do you do with a nose like this?” Students are able to make guesses and discuss possibilities before turning to the next page, which shows the animals in their entirety and provides a brief explanation of how each animal uses its nose. It continues like this for several different body parts. I also love Steve Jenkin’s work, which you can learn more about here. And you definitely don’t want to miss his video about how he creates his work.

Skills & Modifications: I often find that books are the easiest tools to work with because you can easily follow the student’s lead in terms of what they are motivated to look at and what their current skill level is. For this book, I typically choose to focus on just one of the skills listed below, and plan ahead questions I will ask and points of entry for conversation based on my knowledge of the student’s interest and current skill level. As I’ve mentioned in previous discussions about materials I use with students, this should be fun. You can keep it fun by allowing the student time to explore the materials on their own, only asking questions part of the time (so, for example, I won’t ask them to describe each item on the page), and following the student’s lead on what he/she finds motivating.

  • Peer Play/Intraverbal Conversation – One of the my favorite things about this book is that it is usually very motivating for my students with autism AND it is motivating to their typically developing peers or siblings. I have had success using this book to engage my students in sharing guesses or questions with a peer or sibling.
  • Adjectives – This is a great book for having students tell me about a picture or describe an animal, especially on the pages with only one body part showing. For example, I will ask a student to tell me about each nose. The student will point to each nose and tell me 1-2 sentences about it.
  • Compare & Contrast – This is a step beyond simply describing each body part by having students compare two or more. For example, I’ll ask the student “How are these two noses similar?” or “Can you compare these two noses?” For higher level learners, we will compare how the body parts are used once that information has been revealed.
  • Critical Thinking – For higher level learners, this book is great practice for having them make strong guesses about what each body part might be used for. To practice critical thinking skills, I sometimes write on index cards the potential uses. So for noses, one index card says “This nose is uses to give yourself a bath,” another says “This nose is used to dig in the mud,” and so on. Then the student looks at the pictures of just the noses, matches each index card to a nose, then describes how he/she came to that conclusion. We then check answers and discuss what aspects about the size, shape, or features of the nose might have been a clue for it’s function.
  • Expressive Language – All of the examples of activities for this book listed above require the use of expressive language. The book is engaging and naturally fosters interaction with peers, siblings, or adults.
  • Identifying an Object When Part of that Object is Hidden – This skill is very easy to practice due to the design of the book. Some students with autism struggle greatly with this skill.

Pros: For students with autism, this book can help with a variety of skills because there is such clarity about what aspects of the book they should be attending to. For example, the background is white, and the parts of the animals are at the foreground. The subject matter is also engaging for many of my students, and allows for conversation and interaction in a way that many books don’t.

Cons: For early learners, a lot of the animals are not ones they would be familiar with, so it may not be the best tool for certain skills. For example, you wouldn’t expect a student to look at only the eyes of a fish and be able to identify that it is an archerfish. However, it is relatively easy to adjust the activity for your student’s skill level.

Cost: $7.95 Should I buy this? This is a great purchase for a classroom, especially if you have students who are highly motivated by animals.

ABLLS: coming soon

VB-MAPP: coming soon

Teach Through Toys: Quercetti Super Saxoflute

14 Aug

saxofluteAge level: Preschool, Early Elementary

Description: This construction set includes mouthpieces, twisting tubes, and trumpet ends to allow learners to create their own instruments. It is popular with both my preschool and early elementary school students. It’s also a great toy for facilitating parallel play and peer/sibling interaction. Prepare yourself, though, because it can get loud!

Skills & Modifications: The great things about a toy like this is that it easily allows you to follow the learner’s lead and to meet the learner at their current skill level. I will sometimes provide specific instructions to create limitations and challenge the learner, such as “make an instrument using only yellow tubes” or, for older learners “create an instrument with two trumpet ends that face opposite directions.” I’m able to challenge the learner and gauge his/her acquisition or generalization of a specific skill, while he/she is having a blast creating a new instrument.

  • Adjectives/Color Recognition – You can help a student practice adjectives both receptively and expressively. I may request that a student find a curvy piece to add next, or ask them to describe the instrument they just created.
  • Scanning – When students are creating instruments, I typically give them free rein to make whatever they wish. However, sometimes I will request they use a specific piece, and they have to scan an array of pieces to find the one I’ve instructed them to use.
  • Alike & Different/Compare & Contrast – Frequently I will make an instrument with my student. This allows them the opportunity to compare the two instruments, and adds a dimension we don’t get to discuss often: the comparison of sounds. It’s easy for students to see the difference in sound between a very short instrument (such as one with only a mouthpiece and a trumpet end) and a very long instrument.
  • Block Imitation – This is a great activity for testing generalization of block imitation. Though this is not a toy that uses blocks, it is still based on construction skills. Simply take photos of instruments you have created, then have the student recreate them based on the photo. It’s a wonderful natural reinforcer in that the student gets to play the instrument after creating it.
  • Imitation Skills – This is also a great toy for practicing imitation skills in a novel way. With this activity, I will build an instrument along with my student. Then I will have them imitate the number of notes I play, the duration of a note I play, and/or the volume of a note I play.
  • Peer Play – Students are typically highly motivated by this toy. What’s unique about this toy, though, is that my students with Autism are usually motivated by the instrument they’ve created AND any other instruments created by peers or siblings. This toy can be easily used to facilitate peer interactions and joint attention.

Pros: I would actually consider this as one of the must-have toys for educators of young students with autism. There is so much that can be taught with it, and students have a high level of motivation to engage in the activities presented.

Cons: Sometime I actually wish there were more pieces included in the set. It may be worth it to purchase two sets in order to allow for a greater range of options in play and teaching.

Cost: $14.99 Should I buy this? Yes!

ABLLS: coming soon

VB-MAPP: coming soon

Teach Through Games: Iota by Gamewright

27 Jun

iotaAge level: Upper elementary, Middle school, High school
Description: First of all, this is one of the tiniest games you’ll ever find. The goal of this card game is to add cards to a grid, making sure that color, shape, and number are either all the same or all different across the line. Sounds simple enough, right? Well, it’s definitely not as simple as it seems!
Skills & Modifications: The card game is designed in such a way that it makes use of a student’s visual performance, scanning, spatial reasoning, critical thinking, and categorizing skills. For some of my higher functioning students, I will play the game as designed. The instructions that come with the game offer the following variations: (1) for a short game, play with half the deck, and (2) for younger children, ignore scoring. I would add to that list (3) for younger children or lower-functioning learners create one line at a time (instead of a larger grid.)

  • Alike & Different – Even if you are using one of the variations listed above, it is a good idea to have the student describe what is alike and different about each row. This is a great way to practice because there are only three areas in which each card can be alike or different: color, shape, and number. For students who need it, I may have a visual or textual reminder of those three areas to help them with descriptions, but I try to fade those reminders very quickly.
  • Scanning – For higher-order scanning, I will put out as few as three cards and up to 12 cards with instructions to “point to a card that is red” or “find a triangle”, or to make it more difficult “show me a blue circle.” Based on the child’s skill level, I do not line up the cards in a row to practice this skill, but put them in a messy array on the table, floor, or playing surface.
  • Critical Thinking – As I mentioned before, this game is designed to practice a multitude of skills. I think of putting all those skills together to come up with solutions to problems can be described as critical thinking. The game does this when played by the rules. You can also do it by placing three cards, then having an array of possibilities for completing the line. Having the student place the correct card to finish the line, then describe why it is the correct card is another way to work on critical thinking skills.

Pros: I do like the simple design of the cards. It’s especially great for our students who may struggle to process information when the picture is too cluttered. I also appreciate the strategy aspect of this game: it’s easy enough for most children over the age of 7 or 8 to play, but as they child grows so does their capacity to develop strategies for winning the game.
Cons: While I love the game, for some students who have deficits in motor skills, picking up these cards can be difficult and may decrease motivation in the game.
Cost: $9.99 Should I buy this? This is a great game for visual skills. Because it is easy to modify for a variety of age & skill levels, I think it is a good purchase.
ABLLS: B25
VB-MAPP: VP-MTS 7, VP-MTS 8, VP-MTS 15

Teach Through Games: Bug Trails

17 Jun

Bug TrailsAge level: Early Elementary
Description: This is a 6-legged domino game designed for kids ages 6 and up. This is played as a domino game typically is, except that you must match up the colors on all legs touching the bug that’s already been placed on the table. This game is put out by Thinkfun, a company that consistently puts out great games and toys for students.
Skills & Modifications: The primary skill for this game is high-level matching. This is a great game to play with multiple students because you can easily differentiate based on each student’s skill level and/or IEP goals.

  • Matching – This game is well-received by typically developing students between 6-8 years old. However, it can be difficult to play as designed with students with autism. For those students who are struggling with matching skills, I have found that this is frustrating for them because while they may be able to match the colors of one leg to another, matching two or more legs to legs of another bug is too difficult. For these students, instead of playing by the rules, I will place two to three options in front of them so they can choose which one would match the bug already placed on the table. In some cases, I may just place one bug and let them figure out how the bug should be oriented to match it to bugs already placed on the table. Another way to practice matching is to set out several bugs and have the students find the bugs with the same faces.
  • Scanning – For students working on scanning skills, I will change the game so that it is not a turn-taking game. Instead, I will spread out several bugs with the direction of finding one with two blue legs or one yellow leg. We will then match the bug to one already placed on the table.
  • Taking Turns – This is a great game for taking turns, especially if you working with your student on taking turns with more than two players.
  • Accepting Losing – This game does have a definitive winner so if you have a student struggling with accepting losing games, it’s a good one for practicing.
  • Counting – This is great for preschool students who are learning to count a specified item in a field of items. For example, I will ask the child to count how many blue legs a bug has, with the distractors being the legs of other colors on the bug.
  • Seek & Find – To practice this skill, I’ll spread out several bugs on the table and ask the student to find a bug based on a specific characteristic, such as “Find a bug that looks angry” or “show me a bug with two red legs.”
  • Identifying Emotions – I love that each bug has a different facial expression. If you’re working with students with autism who have just started to identify basic emotions, this is a great way to test for generalization or use the student’s motivation to look at the bugs as an introduction to emotions. I will typically ask “How does this bug feel?” or “Is this bug angry or happy?”
  • Alike & Different – For this skill, I will place two bugs side by side and have the student describe how they are alike and different.
  • Intraverbal Skills – The last skill I work on with this game is describing the bug. I will say “Tell me about the bug” and the child can tell me about the colors of each leg, the facial expression, parts of the face, etc.

Pros: As mentioned in the How section, when I’m considering whether or not to buy a game, I look to see if the game has a natural hook. The design of the bugs in this game are a great hook for early elementary students. The kids I’ve introduced this to enjoy looking at and talking about the bugs.
Cons: For students with autism, this may not be the most appropriate game when played as designed. For students struggling with matching skills, this is frequently too high level, while for students ready for higher level matching skills, this game may no longer be age appropriate.
Cost: $14.99 Should I buy this? I think this is a great purchase if you are a classroom teacher or work with multiple students because there are so many skills you can practice with it. If you are a parent, it’s a good purchase if your student would be highly motivated by the bugs.
ABLLS: B3, C16, C24, C38, C47, G13, G22, G42, H40, R3, R4, R5
VB-MAPP: VP-MTS 2, Listener 7, Tact 11, Listener 11, Math 13

Teach Through Games: Make ‘N’ Break

11 Jun

MakenbreakAge level: Preschool, Early Elementary, Upper Elementary
Description: A beat-the-clock game for building structures based on picture cards, this game is easy to play, easy to differentiate, and highly motivating for students.
Skills & Modifications: As described in the When section, before I ever read the instructions to a game, I always looks at all the materials included in a game to brainstorm ways I could use them to meet the individual needs of my students. This game includes a dice with only the numbers 1-3, a timer with levels 1-3 (each level making the timer run for longer) and a two separate buttons for starting and stopping the timer, 10 rectangular blocks of different colors, 80 cards with three separate skill levels for building structures using the blocks, and counters for 1, 10, and 25. If you’re a teacher, there are innumerable ways to use these materials!

  • Block imitation – For some students, I only use the cards and the blocks to practice building structures based on a picture. It is wonderful that the cards are already differentiated for me, so I can meet the students at his/her current skill level.
  • Accepting Losing A Game – For students who struggle with losing a game or not doing well on their turn, this is great practice for having them accept not finishing the structure before the timer goes off. You can use the timer as prescribed by the game, or you can use the timer as a “current functioning level” for your student by providing simple cards to create but setting the timer for a briefer amount of time.
  • Alike & Different – Sometimes I will build a structure that is slightly different from the one pictured on the card and have the student describe how the two are alike and different, or I will have the student find the difference if he/she has made an error. At other times, I will just use the blocks and build two different structures, then have the learner describe for me how they are alike and different, which also connects with teaching…
  • Prepositions – It’s easy to use just the blocks for having students practice receptive and expressive language skills with prepositions. For receptive skills, I may ask the student a questions such as “What color is UNDER the red block?” For expressive skills, I may ask the student to describe the location of the blocks.
  • Measurement – For early learners, when we first introduce measurement and the concept of units of measurement, we don’t typically start with tools such as rulers. We start by having the student measure with common objects, such as paperclips. I love to use the rectangle blocks as a comparison to measurements with paper clips. They’re easy to manipulate and provide a clear demonstration of how important it is to use the same unit of measurement.
  • Addition/Multiplication – When first introducing addition or multiplication facts, I’ll use the dice as a way to practice drills for increasing fluency with sums and facts. I’ll have a number card out (such as an 8 written on an index card) and the student will roll the dice. He/she will have to add or multiply (depending on the skill your practicing) by the number that shows up on the dice. I like that the numbers only go up to 3 since sometimes the learner has not yet been introduced to equations with higher numbers.
  • Skip Counting – When students are first practicing skip counting, I will sometimes use the counters for practicing counting by 10s or 25s. It can also be a good link to multiplication when you introduce multiplying by 10s.
  • Mand for missing items – For students who are able to tact (label) colors but do not mand (request) items that are missing, this can be a good activity for practice. To do this, I place the picture card in front of them and the blocks they need except for one. They have to ask me for the block in order to complete the structure.
  • Anything requiring a timer – I appreciate that this timer is a little more abstract and can be leveled based on your needs. I use this timer sometimes, especially if a learner is already motivated by the game, and has a positive association with this particular timer.

Pros:  For early learners or learners with deficits in gross motor skills, I love that the blocks are large enough for them to grasp easily. The game is highly motivating for a range of students and easy to modify based on your student’s current functioning level. It also is easy to differentiate among 2 or more learners if you are playing as a group.
Cons: This could be considered a pro or a con based on your student, but the timer is quite loud when it runs, which may be distracting for some students as they try to build their structure or complete any other task you may have given them.
Cost: $29.95 Should I buy this? This is a bit pricey, but you can find it cheaper on amazon or ebay sometimes. As a teacher, there are multiple uses for it so I wouldn’t hesitate to make the purchase if it fits for your students. If you’re a parent, I think it’s a great game for students with autism or other developmental delays because it’s so easy to modify based on your child’s needs. It should also be noted that there are multiple versions of this game that may be more appropriate for your student, such as Make ‘N’ Break Mini, Make ‘N’ Break Junior, or Make ‘N’ Break Extreme.
ABLLS:  B12, B23, C51, G22, G35, K15, R15, R16, R20
VB-MAPP:  Mand 6, Play 6

Teach Through Games: Build A Robot

19 Jan

robot-spinner-gameAge level: Preschool, Early Elementary
Description: This game contains four puzzles that create robots. Each body part is numbered 1-5 and each robot has a tool (such as a hammer.) There is a spinner with 1-5 and tool as choices. Kids are trying to build their robot the fastest, based on what body part they land on with the spinner each turn.
Modifications: You can easily modify this game. During the set up of this game I will practice sorting skills by having students sort the body parts into groups. You can remove some of the choices (so, for example, there are only two choices for a robot head instead of four), make it just a puzzle instead of a game, remove the spinner and simply take turns building your robot, or turn it into a listening game where the students has to choose the body part you are describing. For students who are higher functioning, after we have built our robots, I will ask them what they think the functions of different robot parts are. For example, what would be the function of having three feet compared to having tractor wheels.
Skills: sorting, labeling body parts, describing how things are alike and different, taking turns, accepting losing your turn (since one of the spots on the spinner is “Lose A Turn”
Pros: You can practice several different types of skills simultaneously. Kids are typically motivated by choosing how to make their different or silly. Simple to play.
Cons: I can’t think of any cons for this game.
Cost: $20 Should I buy this? This is another game that I feel is well worth the money.
ABLLS: B14, B19, C21, C44, C46, G5, G12, G13, G22, G28, J1, J2, J3, Z4
VB-MAPP: Tact 5M,Tact 11M,  VP-MTS 2M, VP-MTS 5M, VP-MTS 7M, Play 6M, LRFFC 9M